Showing posts with label Food Storage. Show all posts

Wednesday, February 09, 2011

Cookie Dough Truffles

Honestly, I'm always trying to find new ways to eat cookies! I LOVE them- but I've never been one to eat raw cookie dough. It's the eggs... just thinking of putting raw eggs in my mouth makes me want to throw up! This little quirk has saved me thousands of calories over the years from not sampling the dough as I bake... but this makes up for it right here. Watch out- these are DANGEROUS!

Chocolate Chip Cookie Dough Truffles

8 tbsp. unsalted butter, at room temperature
1/2 cup light brown sugar, packed
1/4 cup NF dry milk powder
2 ¼ cup all-purpose flour (I used whole wheat for mine and they tasted fine)
1 (14 oz.) can sweetened condensed milk
1 tsp. vanilla extract
½ cup mini semisweet chocolate chips
12 oz semisweet or milk chocolate chips
Mini chocolate chips (for garnish)

Directions:

Combine the butter and sugar in a mixing bowl and cream on medium-high speed until light and fluffy, about 2 minutes. Beat in the flour, dry milk, sweetened condensed milk and vanilla until incorporated and smooth. Stir in the chocolate chips. Cover with plastic wrap and refrigerate until the mixture has firmed up enough to form balls. (My house is cool enough in the winter that I totally didn't have to refrigerate my dough at all. It was already the perfect consistency!)

Shape the chilled cookie dough mixture into 1-1½ inch balls. Place on a baking sheet lined with wax or parchment paper. Cover loosely, transfer the pan to the freezer and chill for about an hour.

When ready to dip the truffles, *melt the remaining chocolate chips in a heatproof bowl set over a pot of simmering water. Dip each chilled truffle, one at a time using a fork, coating in chocolate and shaking gently or tapping against the bowl to remove the excess. (If at any point during dipping, the cookie dough balls become too soft, return to the freezer to chill for 30 minutes.) Transfer to a wax-paper lined surface. If using mini chocolate chips for garnish, sprinkle on top quickly after dipping each truffle before the chocolate sets. Once all the truffles have been dipped, store them in the refrigerator until ready to serve.
*you can also melt the chocolate in the microwave. I microwave mine for 1 minute then stir. Then microwave an additional 30 seconds, stir- 15 seconds, stir until chocolate is smooth and melted. Don't do this if you're not familiar with your microwave though- they're all different and if you burn the chocolate it's useless!*

Chocolate Peanut Butter Cookie Dough Truffles

8 tbsp. unsalted butter, at room temperature

1 cup white sugar
2 Tbsp water
1/2 cup NF dry milk powder
3/4 cup cocoa powder
2 cups all-purpose flour (Again used whole wheat for mine with good results but if you're a texture snob use white flour)
1 (14 oz.) can sweetened condensed milk
2 tsp. vanilla extract
3/4 cup peanut butter chips
12-24 oz peanut butter chips
Directions:

Combine the butter, water and sugar in a mixing bowl and cream on medium-high speed until light and fluffy, about 2 minutes. Add the sweetened condensed milk and vanilla until incorporated and smooth. In a separate bowl, combine the flour, dry milk, cocoa powder and salt. Mix well then add to sugar/butter mixture. Dough will be stiff so use your hands or a dough hook to fully mix.  Stir in the 3/4 cup peanut-butter chips. Cover with plastic wrap and refrigerate until the mixture has firmed up enough to form balls.
Shape the chilled cookie dough mixture into 1-1½ inch balls. Place on a baking sheet lined with wax or parchment paper. Cover loosely, transfer the pan to the freezer and chill for about an hour.

When ready to dip the truffles, melt the remaining peanut butter chips in a heatproof bowl set over a pot of simmering water. Dip each chilled truffle, one at a time using a fork, fully coating and shaking gently or tapping against the bowl to remove the excess. (If at any point during dipping, the cookie dough balls become too soft, return to the freezer to chill for 30 minutes.) Transfer to a wax-paper lined surface. Once all the truffles have been dipped, store them in the refrigerator until ready to serve.


Apple German Pancakes

For the past several weeks Bountiful Baskets has been giving us 4-5 Granny Smith apples in our basket. I do love Granny Smiths- they're one of my favorites to just snack on. (I love slightly sour fruit!) The problem that I've run into though is that last month I bought an entire case of Honeycrisp apples and we've still been working on those. I feel like it's my duty to eat the older apples before the newer ones... So now we have an entire shelf in my refrigerator full of Granny Smith. I was browsing my friend's blog earlier today and
voilĂ  Problem solved! Thanks Becca :)
It drives my dear hubby nuts, but I always mess with recipes. I can't help myself- so this is a modified version of the original from Cooking Light. I made two different versions: Healthy ... and not so much. To be completely honest- yes- the non-vegan version tasted better BUT the Vegan pancakes were still polished off by my very picky girls. So while I probably won't make the Vegan version on a regular basis, it's definitely going in my food storage recipe folder.

Vegan Apple German Pancake
Batter:
1 1/3 cup whole wheat flour
1/2 tsp baking powder
1 T sugar
1/4 tsp salt
1/8 tsp nutmeg
4 tsp unflavored gelatin
3/4 cup cold water
1/4 cup plus 2 Tbsp hot water
1 cup rice or almond milk
1 tsp almond extract (or vanilla if you prefer)
3 Tbsp olive oil
Apple Mixture:
1 cup sugar, divided
1 1/2 tsp cinnamon
1/2 tsp nutmeg
*2 cup peeled and thinly sliced granny smith apple (about 2 apples)
Remaining Ingredient:
powdered sugar to taste

1.  Preheat oven to 425. Coat bottom and sides of two 10" pie plates with cooking spray. Combine 1/2 cup sugar, cinnamon, and 1/2 tsp nutmeg; sprinkle evenly over bottom and sides of each pan. Arrange apple in an even spokelike layer in pans. Sprinkle with remaining sugar (1/4 cup sugar per pie dish). Cook apples for 8 minutes in pre-heated oven.
2.  While apples are cooking, prepare batter. Combine flour, baking powder, 1 T sugar, salt, and 1/8 tsp nutmeg in a medium bowl. In a seperate small bowl or (2 c.) liquid measuring cup dissolve gelatin into 3/4 cup cold water. When dissolved, stir in hot water and mix well. Add gelatin mixture, milk, oil, and extract to flour mixture and whisk until smooth. Slowly pour batter over the partially baked apples. Return to oven.
3.  Bake at 425 for 15 minutes, then reduce oven temperature to 375 (do not remove pancake from oven) and bake an additional 13 minutes or until center is set. Sift powdered sugar over the top, serve immediately. Makes 4-6 servings.
**If using food storage to make this recipe, use re-hydrated dried apple slices in place of the Granny Smith.


Yummier Apple German Pancake

Batter:
1 1/3 cup whole wheat flour
1/2 tsp baking powder
2 T sugar
1/4 tsp salt
1/8 tsp nutmeg
4 eggs, beaten
1 1/3 cup milk
1 tsp almond extract (or vanilla if you prefer)
3 Tbsp melted butter
Apple Mixture:
1 cup sugar, divided
1 1/2 tsp cinnamon
1/2 tsp nutmeg
2 cup peeled and thinly sliced granny smith apple (about 2 apples)
Remaining Ingredient:
powdered sugar to taste

1. Preheat oven to 425. Coat bottom and sides of two 10" pie plates with cooking spray. Combine 1/2 cup sugar, cinnamon, and 1/2 tsp nutmeg; sprinkle evenly over bottom and sides of each pan. Arrange apple in an even spokelike layer in pans. Sprinkle with remaining sugar (1/4 cup sugar per pie dish). Cook apples for 8 minutes in pre-heated oven.

2. While apples are cooking, prepare batter. Combine flour, baking powder, 2 T sugar, salt, and 1/8 tsp nutmeg in a medium bowl. Whisk eggs into flour mixture- it will be lumpy and thick. Add milk, butter and extract to flour mixture and whisk vigorously until smooth. Slowly pour batter over the partially baked apples. Return to oven.

3. Bake at 425 for 15 minutes, then reduce oven temperature to 375 (do not remove pancake from oven) and bake an additional 13 minutes or until center is set. Sift powdered sugar over the top, serve immediately.


Wednesday, September 29, 2010

Spaghetti Sauce

This recipe uses a pressure canner and a Vita-mix. If you don't have a canner, you can freeze this recipe in quart-sized freezer bags for up to 6 months with good success. If you don't have a Vita-mix, shucks for you. hehe, seriously.. you can just dice your veggies, simmer until soft and then puree in your blender until smooth.

Spaghetti Sauce
(makes about 3 quarts, or 6 pints)
4 quarts tomatoes (about 24 large)
2 medium carrots (or 1 large carrot), cut into chunks
3 stalks celery with leaves, cut into chunks  
1 medium onion, cut into chunks
1 medium green pepper, cut into chunks
1 Tbsp basil
1 Tbsp oregano
1 Tbsp marjoram
1 tsp rosemary
1 tsp black pepper
1 tsp garlic powder
1 Tbsp sea salt

Wash vegetables, remove stems and blossom end from tomatoes. You can peel your tomatoes as well if you desire. I never do. I have a Vita-mix. That I got for free. (Are you good and jealous now? ok, moving on..) Fill Vita-mix container about halfway with tomatoes. Start on Variable speed 2, gradually increasing to speed 6 until all tomatoes have been sucked into the blades. Remove plug from lid and, one at a time, drop in chunks of your other vegetables until container is about 3/4 full. Turn speed up to high and process 2-3 minutes until you see no trace of any chunks through the container. This high speed will pulverize any peels and seeds from your vegetables. Pour contents of container into a large stockpot (If you don't have a very large one, you can use 2 5-qt pots). Repeat process until all vegetables have been pureed. Heat stockpot to boiling over medium-high heat, stirring occasionally to prevent sticking. Once mixture is boiling, reduce heat to medium to keep a low boil until mixture thickens to desired consistency. This usually takes me about an hour. Again, be sure to stir occasionally to prevent sticking. When you've reached your desired consistency, add seasonings and simmer another 10 minutes.

If you are pressure canning: Ladle hot sauce into hot jars leaving 1-inch headspace. Remove air bubbles. Adjust two-piece caps. Process pints 35 minutes, at 15 pounds pressure in a steam-pressure canner.

If you are freezing: Remove from heat and allow sauce to cool for about 30 minutes. Ladel sauce into labeled freezer jars or bags leaving 1-inch headspace. Allow to cool completely in the refrigerator before freezing. Keeps up to 6 months.

Use this sauce in lasagna, pizza, or over any noodle!
Enjoying some home-made pizza on the lawn. Yum!

Enjoy on some home-made gnocci. 

Apple Pie Filling

Thanksgiving ... It's full of family gatherings-which means family photos, shopping and food. Lots of home-made, fattening and delicious food... Ugh! I'll admit it, I always eat way too much, spend way too much and then look back bitterly at my "fat" Thanksgiving pictures. But, that said... I still love it. However, I do enjoy it a lot more when I'm able to free myself from the kitchen for a few hours at least and enjoy some family time instead of a grueling baking marathon. This apple pie filling really helps out in that department. I can whip out an apple pie in a mere 20 minutes with this stuff! (To my detriment...)

Apple Pie Filling
(yields about 3 quarts)
6 pounds apples
2 cups sugar
1/4 cup flour
1 1/2 tsp cinnamon
1/4 tsp nutmeg
2 Tbsp lemon juice

Wash, peel, core and slice apples. Treat to prevent darkening if desired. (Personally, I don't bother- I'm smothering these babies in sugar and cinnamon anyway... they're going to darken!) Combine sugar, flour and spices. Rinse and drain apples; stir into sugar mixture. Let stand until juices begin to flow, about 30 minutes. Stir in lemon juice.
 At this point if you are freezing the pie filling: Cook over medium heat until mixture begins to thicken. Ladle pie filling into plastic freezer jars or plastic freezer containers, leaving 1/4 inch headspace. Cool at room temperature, not to exceed 2 hours. Seal, label and freeze.
To bottle pie filling: Cook over medium heat just until mixture begins to thicken. Ladle filling into hot quart size jars leaving 1-inch headspace. Remove air bubbles. Adjust two-piece caps. Process 35 minutes in a boiling water canner.

Each quart jar will fill a 9-inch pie shell.

Sunday, September 19, 2010

Salsa (for canning)

This recipe was given to me by a good friend and neighbor and I've been making it every year since. No more Pace in this house! Around here, we call this "the good stuff".

Salsa (for canning)

7 quarts peeled, cored, chopped tomatoes
4 cups seeded, chopped long green chiles
5 cups chopped onion
1/2 cup seeded, finely chopped jalapeno peppers
6 cloves garlic, finely chopped
2 cups bottled lemon juice
2 Tbsp salt
1 Tbsp black pepper
2 Tbsp ground cumin
3 Tbsp oregano leaves
2 Tbsp fresh cilantro

Procedure (as written): Wash and rinse canning jars; keep hot until ready to use. Prepare lids according to manufacturers directions. Wash and dry peppers. Discard seeds and chop. If you choose to peel chiles, peel using this method to blister skins:

Place chiles in a hot oven (400 F) or broiler for 6-8 minutes until skins blister. (I've also used a medium-hot grill.) After blistering skins, place peppers in a pan and cover with a damp cloth or you may put the still hot peppers in a closed zip-top bag. Cool several minutes then slip off skins.
Hot pack: Combine all ingredients except cumin, oregano and cilantro in a large pan and heat, stirring frequently until mixture boils. Reduce heat and simmer for 10 minutes, stirring occasionally. Add spices and simmer for another 20 minutes, stirring occasionally (mixture should be thick- if not, cook a little longer). Ladle into hot, clean jars leaving 1/2 inch headspace. Remove air bubbles and wikpe rims of jars with a clean paper towel. Apply canning lids. Put in canner and let water come to a boil in canner. Process for 35 minutes.

**When I make this salsa I make these changes**
I usually leave out the oregano and add an entire bunch of cilantro instead.
I also use lime juice instead of lemon juice
My family likes things spicy so I usually use 3 cups chopped jalapenos (sometimes I throw in a couple habaneros) and 1 1/2 cups chopped chili peppers or bell peppers or any other mild pepper.
Also, I don't peel my tomatoes or peppers. I chop them with my Vita-mix and it gets the pieces small enough that the peels really don't matter. The peels don't change the taste of the salsa anyway, only the looks- which I don't really care about. Feel free to peel if you like spending the extra time!

And a side note... In case you inadvertantly burn your hands with the peppers, use this trick to help ease the pain: Mix 1/2 cup baking soda and 1/4 cup COLD water to make a thick paste. You can spread this on your hands, or do like I do and just stick your entire hand in the bowl. Ahhhhh!

My family (and my neighbors) laugh at me every year because at least once a year I end up carrying a bowl of baking soda around with me ALL day! Last year I was slicing habaneros and those little beasts burned RIGHT THROUGH MY GLOVES! (It was very traumatic. I now pick habaneros with tongs and throw them straight into the food processor!) This year I chopped about 2 dozen mild chile peppers thinking 'hey, they're mild... I don't need gloves.' FYI... even mild chile peppers BURN if you cut enough of them!

Wednesday, July 28, 2010

Peach Syrup


A couple of weeks ago I bought a half a case of peaches with my Bountiful Basket. They were rock hard when I brought them home so naturally, I set them out on the counter to ripen… and forgot about them! Within a couple of days (probably because it’s been so hot!) they ripened to the point of mush. They still tasted good but they were too soft to bottle traditionally and I knew we’d never be able to eat them all before they would go bad. So to Josh’s delight (my 15-year-old) I made syrup. This kid LOVES syrup (evidenced by the syrup to pancake ration every time he eats breakfast).. Which means we can always use more syrup in our food storage!

First, wash and peel the peaches. These peaches were so ripe I only had to dunk them into hot water for a few seconds before the peel practically melted off. Huge timesaver! I also just used my fingers to break them apart and remove the seed. They were so ripe they offered no resistance so no knife needed! Another time saver. Once the peaches were all de-seeded and peeled, I mashed them thoroughly (again I used my hands- it was fun!- but you can use a food processor or a masher if you’d prefer) and added them to two large pots. Each pot’s ingredients were as follows:

Peach syrup

5 cups pureed/mashed peaches
10 cups sugar
¼ cup lemon juice
1 Tbsp butter (this helps keep mixture from getting too foamy- I don’t recommend going without it!)

Heat mixture over med-high heat until it reaches a full rolling boil. Boil 3-5 minutes then pour into prepared hot quart-sized mason jars. Wipe rims clean and seal with lids just until finger tight. Each pot makes about 3 ½ quarts. When jars are filled, lower into a water bath canner. Process 25 minutes (15 minutes for lower altitudes). Remove jars from canner and allow to sit undisturbed in a draft free area for 12-24 hours. Check each bottle for seal, remove lid and wipe clean before storing.

To peel peaches:

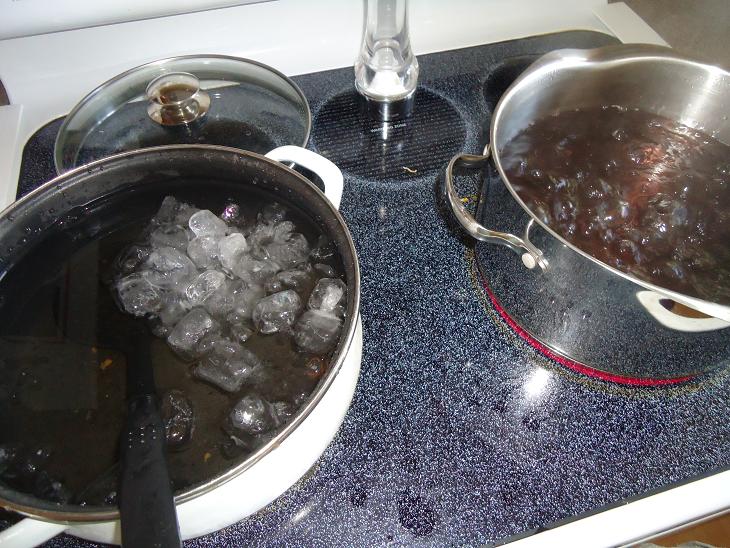
Heat a pot of water to boiling. Drop washed peaches into boiling water, 3-4 at a time. Allow to return to a boil (about 1 minute) then dunk hot peaches into a pot of icy water. Peel should slip right off of the peach at this point.


Tuesday, May 25, 2010

Family Home Storage Center & Bottling Potatoes

Yesterday had a chance to go to the Family Home Storage Center in Springville, UT on my “lunch” break. (I really, honestly went at noon!) The “staff” consists of unpaid service missionaries and they are SO helpful. They are there because they want to be there and are so ready to help people it’s silly. I bought 25 lbs of rolled oats, 20 lbs of elbow macaroni, and 1 #10 can of dry milk. My total came to about $27. They have order forms that you can fill out and bring with you or you can fill one out when you get there. You do NOT need to be a member to buy food from them. You can either leave ward info blank on the order form or just write in your city, etc.

I will end up using some of my purchase for meals in the next month, but I also really try to buy more than what I’ll need so eventually I can start building up my food storage. My husband and I were talking last night about how fragile are lives really are… It’s interesting because, yes, we all love the convenience of our lives, but really- the more convenient are lives become, the more fragile they become as well. That’s why I believe it’s SO important to be prepared. It’s not good enough to just have food in the basement or seeds for the garden. You need to know what to do with it all. What good is a dozen buckets of wheat in your basement if you don’t know how to make bread? So practice now. Become a good cook while you have the luxury of messing up and occasionally “wasting” ingredients. Look at it as an investment. J


Yesterday I also had a chance to bottle some potatoes. Bottled potatoes are my version of “instant” potatoes. They sure do taste a LOT better! It’s really very simple. Just peel and chop potatoes and add to a large pot of water with about 1 tsp Fruit Fresh or 1 Tbsp Lemon Juice to keep potatoes from darkening. When potatoes are all chopped, add to clean jars, leaving about 1” headspace. I used quarts. Discard water from pot. Add enough hot water to cover potatoes in jars. Add 1 tsp salt per jar if desired. Pack jars into cold Pressure CANNER. The water in the canner should be about ½ way up the jars (mine takes 3 quarts water). Add 2 tbsp vinegar to water to keep rims and pot itself from darkening. Close canner securely and allow it to heat and vent steam from vent pipe for about 5 minutes. (It will take at least 30 minutes for this to take place.) Once canner has been heated and vented, add 15lb weight. If you live in a different area, check for your proper weight. In Utah, it will almost always be 15lb no matter what you are canning. Let the canner build pressure until the weight gently rocks. Start timer- 40 minutes for quarts. Remove canner from heat and allow to cool until pressure dissipates. Do NOT remove weight or try to remove lid. This will take another 30-60 minutes. Remove jars from canner and allow to sit undisturbed in a draft-free area overnight. Remove rims, wipe jars clean. Label and store.