Monday, February 28, 2011

Reduced Fat Meatloaf

Okay, most people don't exactly think of meatloaf as a "healthy" food- but it is oh so comforting and delicious that we eat it anyway, right? Most of the deliciousness of the traditional meatloaf comes from the beef fat soaking the bread crumbs and combining with egg yolks, not to mention of course a heaping dose of extra salt and corn syrup in the form of ketchup... But really, people- It doesn't have to be this way! When it comes to cooking, I try to follow one simple rule: Substitute fat for flavor! Instead of relying on fat, salt and sugar to make things taste good, I try to add plenty of flavorful vegetables, fresh herbs and seasonings. Most people would never never guess that most of what I put out on my table is good for you... 
 
Reduced Fat Meatloaf

1-1/2 lbs. extra-lean ground beef, ground turkey breast, or extra-lean ground turkey
2 egg whites
1 tsp. chopped garlic
1/2 cup chopped onions
3/4 cup chopped green pepper

1/2 cup finely chopped celery
1/2 cup unsweetened tomato sauce
1 cup rolled oats
2 tsp. Dijon mustard
1/4 cup fresh parsley (or basil if you have it available!)
Salt and pepper to taste

Preheat oven to 350 degrees. Place all ingredients in a large bowl and mix together well with wooden spoons or hands. Place on board or waxed paper and shape into loaf, then place in loaf pan and bake for about 1 hour. Depending on the shape and thickness of the loaf, it may need to cook for slightly longer. Serves 6. If you need more "sauce" when serving, skip the ketchup and use unsweetened tomato sauce sprinkled with basil and oregano.

Preparation Time: 20 minutes

Cooking Time: 1 hour


When I make this recipe I usually make at least double- one for now and one for later. To freeze for later, cook as above. Allow meatloaf to cool completely, remove from pan, then wrap tightly in plastic wrap and heavy duty aluminum foil. Label and freeze up to 3 months. To serve: Allow to thaw in the refrigerator then cook covered in a 350 degree oven for 30-60 minutes or until fully heated.

Friday, February 18, 2011

Mellissa's Birthday Cake

I am an amateur cake artist. I like to bake. I like to draw.. so cake decorating should come naturally, right? *snort* Not so much... Here is an evolution of cakes:
Mellissa's 1st birthday

Savanna's 4th Birthday

Savanna's 6th birthday

Marsa's 2nd birthday

Yes I know there's a lot of gaps.. The missing cakes were SO terrible I didn't even take pictures! My favorite mishap was Savanna's 5th birthday cake. She wanted a Dora and Diego cake that was blue with purple frosting and chocolate... Sounds gorgeous right? Ugh!
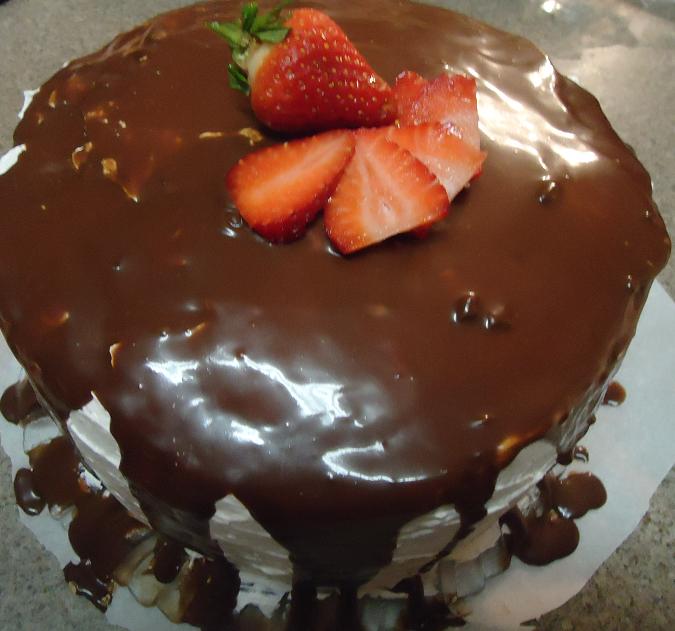
And here is Mellissa's cake. My crown jewel to this point! It was a lot of fun to make and best of all people never guessed that I actually made it! lol Maybe some day I will look back on this cake and be embarrassed but for now I think it turned out great. :)


My favorite part of this cake was the teapot.. the one in the pictures is a plastic teapot.. but I actually made one out of white chocolate as well that I ended up not using. Last minute I decided that it looked a bit weird, plus I couldn't figure out how to let 14 4-year-olds divide it up... The plastic teapot is a bit big, I think, for the size of the cake but oh well, right?

To make the chocolate teapot, I melted 1 bag (12 oz.) of white chocolate chips that I got on sale over Christmas time. (They were $.89/bag.)
I then lightly sprayed two "balls" in a Wilton mini-ball pan and poured half the melted chocolate into each one.

I let it cool for about 5 minutes in the refrigerator. Then scooped the soft middle out of each half of the ball to make a hollow chocolate shell.
I then used the semi-soft chocolate that I'd scooped out to "glue" the two halves of the ball together. Then I formed a handle, spout, and lid with it and attached that as well. By this point the chocolate was getting pretty hard again, but I just let it warm up a bit in my hands so I could shape it and attach. The rest of the decorations on the teapot were made with tinted Royal icing.


If you're not impressed yet, then I'll tell you that I also made 14 tutus and wings for all the cute little guests as well. Did that do it? I sure hope so since that's why I do these sort of things anyway. To impress all of you folks out there! Seriously, all the hard work was so worth it just to see such a cute group of kids having so much fun!


Thursday, February 17, 2011

Valentines Day Fun

I didn't make anything super extraordinary for Valentine's Day. But I made the day fun with heart shaped food all day! For the little kids anyway... My boys weren't too excited about a heart-shaped steak at dinnertime...

We had heart shaped pancakes. I even threw some strawberry gelatin into the batter for pink and flavored pancakes. But was too busy getting kids off to school to take a picture.

At lunchtime I let the kids choose what kind of sandwich they'd like and cut them all into heart shapes for them. I even cut the apples into hearts and served pink lemonade with heart-shaped strawberries.

 Then we had some non-food fun and made some Valentines. Kids love to glue things. They were entertained for MINUTES! (Seriously.. almost an hour which is amazing!)


For dessert, if I'd thought ahead a few more days, we would have had this cake. (I didn't end up actually making it until last night) So FUN!


Happy Late Valentine's Day everybody. Hope yours was as fun as mine!

Runzas

When I was growing up my dad used to take us to Cabella's in Nebraska once in a while. As a special treat we'd go across the street and grab some Runzas for lunch before the long drive home. Yum! I don't know if I would have appreciated them as much if I'd known how easy they were to cook..

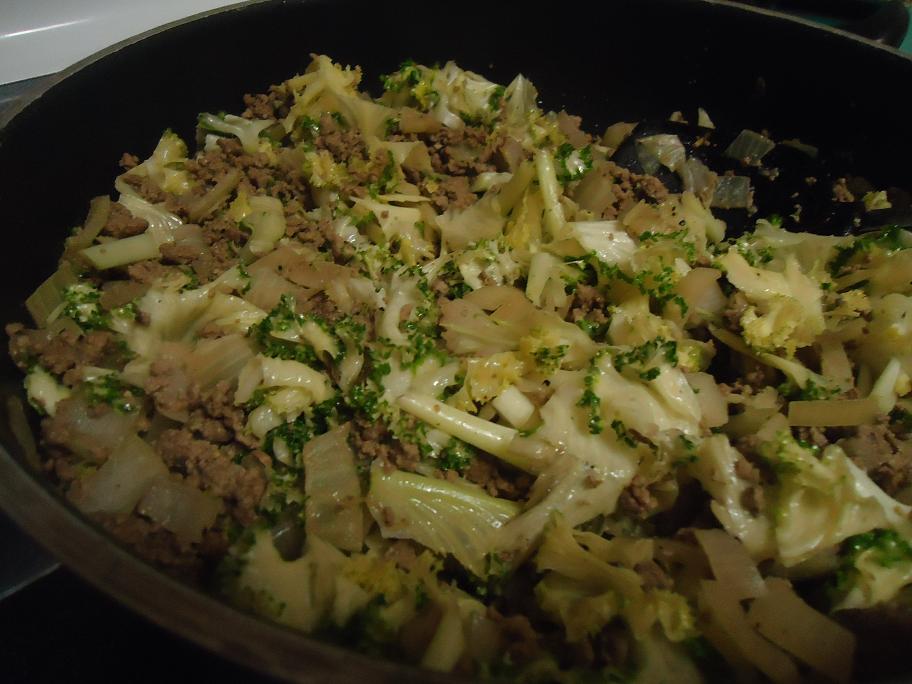
I made these last week sometime (don't ask me to remember actual dates please). I didn't have cabbage, but I got two heads of salad savoy in my Bountiful Basket the week before so I used one of those instead. (A little bit milder tasting than cabbage but still excellent, in my opinion.)

Runzas

1 lb lean ground beef
1 onion, chopped
4 cups chopped cabbage
1 1/2 tsp salt
1/4 tsp pepper
1 recipe bread dough of your choice (also works fine with frozen/defrosted rolls)
8 slices Swiss, Mozzarella or Provolone cheese

Brown beef and onion in skillet. Add cabbage and cover. Cook 5 minutes until cabbage is tender crisp. Drain off liquid. Add salt and pepper and mix well. Cool in refrigerator while making dough.

Roll dough out to form two *12x14-inch rectangles. Cut the rectangles into 8 squares each. Place about 1/4-1/2 cup of meat-cabbage mixture in the middle of 8 of the squares. Moisten edges of squares with water. Top with sliced cheese and remaining squares of dough. Press dough firmly around the edges.


Place on greased baking sheets. Cover lightly with a clean dish towel. Let rise about 30 minutes or until light. Bake at 350 degrees F. for 20 minutes.

* the dough will be thin- if you like a thicker bread taste, roll just one rectangle about twice as thick for half as many finished runzas. Also, unless you've got somebody with OCD in your family.. don't worry if your Runzas are oddly shaped. I didn't! ;)


Wednesday, February 09, 2011

Cookie Dough Truffles

Honestly, I'm always trying to find new ways to eat cookies! I LOVE them- but I've never been one to eat raw cookie dough. It's the eggs... just thinking of putting raw eggs in my mouth makes me want to throw up! This little quirk has saved me thousands of calories over the years from not sampling the dough as I bake... but this makes up for it right here. Watch out- these are DANGEROUS!

Chocolate Chip Cookie Dough Truffles

8 tbsp. unsalted butter, at room temperature
1/2 cup light brown sugar, packed
1/4 cup NF dry milk powder
2 ¼ cup all-purpose flour (I used whole wheat for mine and they tasted fine)
1 (14 oz.) can sweetened condensed milk
1 tsp. vanilla extract
½ cup mini semisweet chocolate chips
12 oz semisweet or milk chocolate chips
Mini chocolate chips (for garnish)

Directions:

Combine the butter and sugar in a mixing bowl and cream on medium-high speed until light and fluffy, about 2 minutes. Beat in the flour, dry milk, sweetened condensed milk and vanilla until incorporated and smooth. Stir in the chocolate chips. Cover with plastic wrap and refrigerate until the mixture has firmed up enough to form balls. (My house is cool enough in the winter that I totally didn't have to refrigerate my dough at all. It was already the perfect consistency!)

Shape the chilled cookie dough mixture into 1-1½ inch balls. Place on a baking sheet lined with wax or parchment paper. Cover loosely, transfer the pan to the freezer and chill for about an hour.

When ready to dip the truffles, *melt the remaining chocolate chips in a heatproof bowl set over a pot of simmering water. Dip each chilled truffle, one at a time using a fork, coating in chocolate and shaking gently or tapping against the bowl to remove the excess. (If at any point during dipping, the cookie dough balls become too soft, return to the freezer to chill for 30 minutes.) Transfer to a wax-paper lined surface. If using mini chocolate chips for garnish, sprinkle on top quickly after dipping each truffle before the chocolate sets. Once all the truffles have been dipped, store them in the refrigerator until ready to serve.
*you can also melt the chocolate in the microwave. I microwave mine for 1 minute then stir. Then microwave an additional 30 seconds, stir- 15 seconds, stir until chocolate is smooth and melted. Don't do this if you're not familiar with your microwave though- they're all different and if you burn the chocolate it's useless!*

Chocolate Peanut Butter Cookie Dough Truffles

8 tbsp. unsalted butter, at room temperature

1 cup white sugar
2 Tbsp water
1/2 cup NF dry milk powder
3/4 cup cocoa powder
2 cups all-purpose flour (Again used whole wheat for mine with good results but if you're a texture snob use white flour)
1 (14 oz.) can sweetened condensed milk
2 tsp. vanilla extract
3/4 cup peanut butter chips
12-24 oz peanut butter chips
Directions:

Combine the butter, water and sugar in a mixing bowl and cream on medium-high speed until light and fluffy, about 2 minutes. Add the sweetened condensed milk and vanilla until incorporated and smooth. In a separate bowl, combine the flour, dry milk, cocoa powder and salt. Mix well then add to sugar/butter mixture. Dough will be stiff so use your hands or a dough hook to fully mix.  Stir in the 3/4 cup peanut-butter chips. Cover with plastic wrap and refrigerate until the mixture has firmed up enough to form balls.
Shape the chilled cookie dough mixture into 1-1½ inch balls. Place on a baking sheet lined with wax or parchment paper. Cover loosely, transfer the pan to the freezer and chill for about an hour.

When ready to dip the truffles, melt the remaining peanut butter chips in a heatproof bowl set over a pot of simmering water. Dip each chilled truffle, one at a time using a fork, fully coating and shaking gently or tapping against the bowl to remove the excess. (If at any point during dipping, the cookie dough balls become too soft, return to the freezer to chill for 30 minutes.) Transfer to a wax-paper lined surface. Once all the truffles have been dipped, store them in the refrigerator until ready to serve.


Apple German Pancakes

For the past several weeks Bountiful Baskets has been giving us 4-5 Granny Smith apples in our basket. I do love Granny Smiths- they're one of my favorites to just snack on. (I love slightly sour fruit!) The problem that I've run into though is that last month I bought an entire case of Honeycrisp apples and we've still been working on those. I feel like it's my duty to eat the older apples before the newer ones... So now we have an entire shelf in my refrigerator full of Granny Smith. I was browsing my friend's blog earlier today and
voilà Problem solved! Thanks Becca :)
It drives my dear hubby nuts, but I always mess with recipes. I can't help myself- so this is a modified version of the original from Cooking Light. I made two different versions: Healthy ... and not so much. To be completely honest- yes- the non-vegan version tasted better BUT the Vegan pancakes were still polished off by my very picky girls. So while I probably won't make the Vegan version on a regular basis, it's definitely going in my food storage recipe folder.

Vegan Apple German Pancake
Batter:
1 1/3 cup whole wheat flour
1/2 tsp baking powder
1 T sugar
1/4 tsp salt
1/8 tsp nutmeg
4 tsp unflavored gelatin
3/4 cup cold water
1/4 cup plus 2 Tbsp hot water
1 cup rice or almond milk
1 tsp almond extract (or vanilla if you prefer)
3 Tbsp olive oil
Apple Mixture:
1 cup sugar, divided
1 1/2 tsp cinnamon
1/2 tsp nutmeg
*2 cup peeled and thinly sliced granny smith apple (about 2 apples)
Remaining Ingredient:
powdered sugar to taste

1.  Preheat oven to 425. Coat bottom and sides of two 10" pie plates with cooking spray. Combine 1/2 cup sugar, cinnamon, and 1/2 tsp nutmeg; sprinkle evenly over bottom and sides of each pan. Arrange apple in an even spokelike layer in pans. Sprinkle with remaining sugar (1/4 cup sugar per pie dish). Cook apples for 8 minutes in pre-heated oven.
2.  While apples are cooking, prepare batter. Combine flour, baking powder, 1 T sugar, salt, and 1/8 tsp nutmeg in a medium bowl. In a seperate small bowl or (2 c.) liquid measuring cup dissolve gelatin into 3/4 cup cold water. When dissolved, stir in hot water and mix well. Add gelatin mixture, milk, oil, and extract to flour mixture and whisk until smooth. Slowly pour batter over the partially baked apples. Return to oven.
3.  Bake at 425 for 15 minutes, then reduce oven temperature to 375 (do not remove pancake from oven) and bake an additional 13 minutes or until center is set. Sift powdered sugar over the top, serve immediately. Makes 4-6 servings.
**If using food storage to make this recipe, use re-hydrated dried apple slices in place of the Granny Smith.


Yummier Apple German Pancake

Batter:
1 1/3 cup whole wheat flour
1/2 tsp baking powder
2 T sugar
1/4 tsp salt
1/8 tsp nutmeg
4 eggs, beaten
1 1/3 cup milk
1 tsp almond extract (or vanilla if you prefer)
3 Tbsp melted butter
Apple Mixture:
1 cup sugar, divided
1 1/2 tsp cinnamon
1/2 tsp nutmeg
2 cup peeled and thinly sliced granny smith apple (about 2 apples)
Remaining Ingredient:
powdered sugar to taste

1. Preheat oven to 425. Coat bottom and sides of two 10" pie plates with cooking spray. Combine 1/2 cup sugar, cinnamon, and 1/2 tsp nutmeg; sprinkle evenly over bottom and sides of each pan. Arrange apple in an even spokelike layer in pans. Sprinkle with remaining sugar (1/4 cup sugar per pie dish). Cook apples for 8 minutes in pre-heated oven.

2. While apples are cooking, prepare batter. Combine flour, baking powder, 2 T sugar, salt, and 1/8 tsp nutmeg in a medium bowl. Whisk eggs into flour mixture- it will be lumpy and thick. Add milk, butter and extract to flour mixture and whisk vigorously until smooth. Slowly pour batter over the partially baked apples. Return to oven.

3. Bake at 425 for 15 minutes, then reduce oven temperature to 375 (do not remove pancake from oven) and bake an additional 13 minutes or until center is set. Sift powdered sugar over the top, serve immediately.


Monday, February 07, 2011

Lemon Balsamic Vinaigrette & Tomato Cucumber Salad


Tomato Cucumber Salad

2 large cucumbers, diced
1 yellow crookneck squash, diced
1/2 red onion, thinly sliced
3 large tomatoes, diced
1 cup chopped black olives
1 red pepper, diced
6 oz mozzarella cheese, cubed
1 cup Lemon Balsamic Vinaigrette dressing

In a large salad bowl, mix together the cucumbers, zucchini, red onion, tomatoes, black olives, basil, and thyme. Drizzle dressing all over vegetables- you may not end up using the entire cup of dressing. Sprinkle cubed mozzarella onto each individual serving of salad.

Lemon Balsamic Vinaigrette
 1/4 cup red wine vinegar
2 Tbsp balsamic vinegar
zest from one lemon
1 lemon, juiced
1 1/2 tsp kosher salt, or to taste
1/2 tsp white sugar
1/2 tsp freshly ground black pepper
1 tsp dried basil
1 tsp dried thyme
1/2 cup extra-virgin olive oil

Directions

In a small mixing bowl, whisk together the red wine vinegar, balsamic vinegar, lemon zest, lemon juice, kosher salt, sugar, basil, thyme, and pepper until thoroughly combined. Pour the olive oil slowly into the dressing mixture, whisking to combine. Pour the dressing over the salad, and serve. Makes 1 cup.

Herbes De Provence

There's a lot of combinations of herbs that are used for Herbs De Provence. This is just what I've put together after trying a few variations.


Herbs De Provence

3 Tbsp thyme
3 Tbsp chervil
3 Tbsp rosemary
3 Tbsp summer savory
2 tsp lavendar
1 tsp tarragon
1 tsp marjaram
2 tsp oregano
1 1/2 tsp mint
4 ground bay leaves

Thursday, January 20, 2011

Lemon Pepper Chicken (x2)

Last week boneless, skinless chicken was on sale for $1.39/lb here. Naturally, I stocked up... Last time I bought a bunch of chicken, I bottled most of it for easy casseroles and soups. This time, I decided to freeze it into meal size portions.

But why just freeze plain ol' chicken when you can freeze an entire meal?

So last week I made two different versions of Lemon Pepper Chicken. The first was made for dinner that night for my family. The second I put together as our dinner cooked. By the time dinner was ready to eat, I had three additional meals to put into the freezer for lazy days down the road.

Lemon Pepper Chicken

2 1/2 - 3lb boneless, skinless chicken
2 lemons
1 Tbsp olive oil
2 cloves garlic, minced
1/4 cup finely diced onion
1 Tbsp red wine vinegar
1 1/2 Tbsp dried rosemary
1/2 tsp sea salt
1/2 tsp black pepper (or to taste)

With olive oil, gently oil an 8x11-in dish with a paper towel. Arrange chicken to tightly fill the dish in a single layer. In a small bowl or a liquid measuring cup, mix juice from one lemon, garlic, onion, vinegar, rosemary, salt and pepper to make a paste. Rub seasoning all over the top of each breast of chicken. Pour any remaining liquid from the cup evenly atop the chicken. Thinly slice remaining lemon and est a slice on top of each piece of chicken. Cover dish tightly with foil and bake at 350 degrees F. for 45 minutes. Serve with seasoned wild rice or garlic herbed mashed potatoes.
*Leftover chicken is delicious diced cold and added to a green salad.

While the above recipe cooked, I had time to put together three additional meals for later. I chose to make all three the same since it's one of my favorite recipes. It lasts at least 3 months in the freezer so that gives me plenty of time to work through these!

Make-Ahead Lemon Pepper Chicken (for the oven or the Crock-Pot)

2 cups chopped onion
about 2 1/2 pounds boneless skinless chicken breasts or thighs
1 lemon, thinly sliced and seeds removed
1 cup pitted green olives (optional)
1 tablespoon olive brine from jar or red wine vinegar
2 tsp herbes de Provence
1 bay leaf
1/2 tsp salt
1/8 tsp black pepper
1 cup chicken broth
2 Tbsp dried minced parsley (about 1/2 cup fresh)

Place onion in gallon-sized freezer bag. Arrange chicken over onion. Place lemon slice on each piece of chicken. Add olives, brine, herbes de Provence, bay leaf, salt and pepper. Slowly pour in chicken broth. Freeze.
To serve from the Crock Pot: Defrost & add to 4 1/2 qt. slow cooker. Cover; cook on LOW 5-6 hours or on HIGH 3 to 3 1/2 hours or until chicken is tender. Stir in parsley before serving.
**If I didn't think ahead to allow time for defrosting, I simply run hot water over the bag to loosen it from the meal. I then plop the entire frozen blob into my Crock Pot and add about 30 minutes to the cooking time. Still comes out great!
To serve from the Oven: Defrost completely & place contents of bag into a 2qt. casserole dish. Cover tightly and cook at 350 degrees F. for 45 minutes.

Monday, January 03, 2011

Spinach & Artichoke Dip

Recently I found some heavy whipping cream on clearance for $.45 a pint. I bought all that they had. It's been so fun to find things to do with it. About half of it was turned into butter. Yes, butter. (All you have to do is pour the cream into a jar with a tight fitting lid, add about 1/4 tsp salt and shake and shake and shake until cream is solid. Woila! Butter!) The rest I experimented with. The following dip was served at our little family New Year's Eve party along with some home-made crusty bread. Yum!
Although Holiday parties are over, save this recipe for football parties. It would go great with some Superbowl!


Spinach and Artichoke Dip

1 (14 oz) can artichoke hearts, drained
1/3 cup cottage cheese
1/3 cup Parmesan cheese
1 large clove minced garlic (about 1/2 tsp)
10 oz package frozen chopped spinach, thawed and drained*
1/3 cup heavy cream
1/2 cup sour cream
1 cup shredded mozzarella cheese

Preheat oven to 350 degrees F. Grease 9x13-in baking dish (or 2 qt. casserole dish). In a blender or food processor, place artichoke hearts, cottage cheese, Parmesan cheese and garlic. Pulse until chopped, but not ground. Set aside.
In a medium bowl, mix spinach, heavy cream, sour cream and mozzarella cheese. Stir in artichoke mixture. Spoon into prepared baking dish. Bake in preheated oven for 20-25 minutes, or until cheese is melted and bubbly.

*I actually used spinach from the garden! I had a bunch last Spring so froze a few bags for such occasions as this. Love it!

Crusty 12-hour Bread

Answer: Easy. Cheap. Delicious.
Question: What are three words that best describe Crusty 12-Hour Bread?

This recipe is a modified version of this bread. This has been a staple in my house for the past year since my friend Becca introduced it to me. (thanks!) The only thing difficult about this bread is planning ahead, so... plan ahead and enjoy!

Crusty 12-hour Bread

6 cups flour
2 teaspoons salt
1/2 teaspoon yeast
3 1/2 cups warm water
2 Tbsp vinegar (I've used white, apple cider, and rice all with good results)

1. Mix dry ingredients together in a large mixing bowl. Really, make sure it is a LARGE bowl. The first time I made this recipe, I didn't use a big enough bowl and ended up cleaning bread dough off of my counter after dough had risen. Add water and mix until blended. The dough will be wet, sticky and rough looking. Cover bowl with saran wrap and let it sit 8-10 hours or until dough surface is dotted with bubbles. During the Summer when my house is warmer (about 78 degrees) this only takes about 8 hours. In the Winter it usually takes closer to 10 hours.


2. Spray two large loaf pans (three medium, four small) with cooking spray then dust with cornmeal. (Important! I've never been able to get this bread out of the pan without ripping it when I've skipped the cornmeal. Plus, it just makes it tastier.) Spoon half of dough into each loaf pan. Re-cover with saran wrap and let rise for about 2 hours or until dough has doubled in size.

3. Preheat oven to 400. Bake loaves for 30 minutes. For best results, remove loaves from pans to a cooling rack to cool completely before slicing.

This bread is DELICIOUS as garlic toast, dipped into oil and balsamic vinegar, as an egg sandwich, or with spinach and artichoke dip.

Wednesday, December 29, 2010

Navajo Tacos

I've had a plethora of lettuce in my refrigerator the last couple of weeks (thanks Bountiful Baskets) but salads just don't seem to go over very well in my house in the dead of winter. So the only thing that we end up using our lettuce for is Tacos and Sandwiches. Which both get blah after a while. To mix things up, I decided to make Navajo tacos Monday night instead of the traditional at least once weekly taco. With most all the fixings already made up and frozen in my freezer, dinner went together in less than thirty minutes!

Navajo Tacos

12 frozen uncooked rolls
1 lb cooked ground meat mix
2 Tbsp Taco seasoning
1 can black beans (optional)
1 can refried beans, undrained
1/2 head lettuce, shredded
2 roma tomatoes, diced
8 oz. shredded cheese
8 oz. bottled salsa
3 cups oil for frying (I just used vegetable oil)

Fry Bread:

Set out rolls in a warm place 2-3 hours before dinner on a lightly greased cookie sheet. Cover loosely with a
cotton cloth or plastic wrap. 30 minutes prior to eating, heat oil in a large skillet to 350 degrees F. I've found a good way to test the oil temperature is by dropping a small piece of bread dough into the oil when you start heating. When the dough rises to the surface of the oil and is fully browned, it should be about ready to fry your bread. Work each roll into a thin flat circle about 1/8-inch thick. Drop slowly into hot oil. Wait for bread to puff up (about 30 seconds) then use metal tongs to flip over. Bread should be golden brown on each side. Place vertically in a paper towel lined casserole dish to allow oil to drain from bread.

Meanwhile, combine cooked ground beef with undrained black beans and Taco Seasoning. Warm refried beans (add a little more taco seasoning to the refried beans for extra flavor if desired), chop lettuce and tomatoes, shred cheese. Serve Navajo tacos by cutting open the puffy fry bread and filling with toppings of your choice. Or pile everything on top of the bread and eat with a fork.

Taco Seasoning Mix

Raise your hand if you LOVE MSG in your food!! .... What? Nobody? Well, neither do I.. which is why I don't buy pre-packaged seasoning mixes. You're mostly getting fillers in those anyway and it's hard to **shine** as a good cook when you rely on them. I do, however, love things to be easy. Which is why I make as many of my own home-made mixes as possible. Here is the mix I put together for Mexican food. I call it Taco seasoning, true... but I use it for so much more! From Tacos to Macaroni and cheese. Enjoy!

Taco Seasoning

2 Tbsp chili powder
2 Tbsp ground cumin
1 Tbsp paprika
1 tsp oregano
3 tsp onion powder
2 tsp galic powder
1/4 tsp cayenne pepper

Mix all ingredients and store in an airtight container. The flavor will be more potent than store-bought mixes so start with half of what your recipe calls for and increase according to your taste. I usually at least quadruple this recipe.

About 1 1/2 Tbsp Taco seasoning mix = 1 envelope Taco seasoning

Sue's Rolls

For Christmas dinner, I was in charge of bringing the rolls. Naturally, I made an enormous batch of dough and froze some for later enjoyment. For my basic one-hour bread recipe, I usually bake the bread/rolls before freezing because I've found that it just doesn't rise like it should after it's been frozen. The following recipe, however, is a gem! It comes from one of my mother-in-law's neighbors. There's a little more to it, but the taste is rewarding enough for the extra effort. And it freezes well uncooked.


Sue's Rolls
(by Sue Adams)

2 Tbsp yeast
1/2 cup sugar
1/2 cup warm water
1 Tbsp salt
1 tsp sugar
1 cup cold water
3/4 cup boiling water
2 eggs
2 Tbsp butter
6 cup flour

In a large mixing bowl, dissolve yeast and 1 tsp sugar in warm water. In a pan, combine boiling water, butter, sugar and salt. Add cold water. Beat eggs into yeast mixture , add water-butter liquid and beat. Add flour to make a soft dough. Cover and let rise until double (about 45 minutes). Roll out on a floured surface and shape into rolls. Let rise and bake for 10-12 minutes at 400 degrees F. OR place on buttered cookie sheet. Cover well and freeze. Remove 4-5 hours before dinner, uncover and thaw and rise. Bake for 10-12 minutes at 400 degrees F.

Tuesday, December 28, 2010

Holiday Cookie Exchange

As a last minute idea, I decided this year I'd host a Cookie Exchange. I read about the idea on Msn.com and thought how lovely it would be to have my usual variety of cookies on hand for my family and friends without having to actually bake several different batches of the goodies! Because it was so last minute, I hosted it open-house style and very basic. No activities, no other goodies, not even really any socializing. For the busy holiday prepper it was perfect! We baked our cookies, we met together, we exchanged cookies, we waved goodbye. I had originally thought that if I did this again, I'd make it more of an event rather than just a simple exchanging of cookies... but I gotta say, I loved the simplicity of it all. It may just be the same next year after all!

Here are the stars of the show:

Sugar Cookies with Orange Buttercream Frosting
Orange Buttercream Frosting
(Submitted by Sheryl Rose)
1 cup butter, softened
1 cup white sugar
1/4 cup all-purpose flour
1 cup milk
1 tsp vanilla extract
Zest of 1/2 an orange

In a small saucepan cook flour, orange zest and milk until it forms a ball, stirring constantly. Cool to room temperature. With an electric mixer, beat butter and sugar until fluffly. Beat both mixtures together on high speed until fluffy and smooth. Add vanilla and beat until combined. Refrigerate for about 1/2 hour, until it is of spreading consistency.

Bake cookies as directed. Allow to cool completely then frost with Orange Buttercream Frosting. Refrigerate any un-eaten cookies.

Oatmeal Butterscotch Cookies **wheat free**
(sub butterscotch chips for raisins to make these dairy free- submitted by Andrea Daley)

3/4 cup Soy butter
3/4 cup white sugar
3/4 cup packed brown sugar
1/8 cup real Maple syrup
2 large eggs
1 1/2 tsp vanilla extract
1 3/4 cup oat or spelt flour
1 tsp baking soda
3/4 tsp cinnamon
1/2 tsp salt
4 cups rolled oats (not quick oats)
1 12-oz package butterscotch chips

Preheat oven to 375 degrees F. Beat the butter and sugars together until light and fluffy. Next, add the eggs, one at a time, beating after each addition so that they are completely incorporated. Beat in vanilla.

In a separate bowl, combine the flour, baking soda, cinnamon, salt and rolled oats. Gradually add the dry ingredients into the creamed mixture. Fold the butterscotch chips into the cookie dough.

Drop by heaping tablespoonfuls onto a greased cookie sheet, 2 inches spaced to allow for spread. Bake for 9 minutes or until edges are lightly golden brown. Cool on the sheet for 5 minutes before removing to cooling racks.

Peanut Butter Blossoms
(submitted by Meg McInnes)

36 Hershey Kisses
1/2 cup shortening
3/4 cup creamy peanut butter
1/3 cup white sugar
1/3 cup packed brown sugar
1 egg
2 Tbsp milk
1 tsp vanilla
1 1/2 cup flour
1 tsp baking soda
1/2 tsp salt
*enough sugar to roll the cookies into

Unwrap chocolates. Beat shortening and peanut butter together until blended. Add sugars, beat until fluffy. Add egg, milk and vanilla. Mix well. Stir in the rest of the ingredients except extra sugar and unwrapped chocolate kisses. Roll dough into 1 inch balls. Roll balls in sugar and place on a slightly greased cookie sheet. Bake at 375 degrees F for 9-11 minutes. After removing cookies from oven, immediately place a kiss in the middle of each cookie (It will crack the cookie.) Remove cookie to cooling rack and allow to cool.

Texas Governor's Mansion Cowboy Cookies
(submitted by Tamara Pilcher)


3 cups all-purpose flour
1 T. baking powder
1 T. baking soda
1 T. ground cinnamon
1 t. salt
1 1/2 c. butter, at room temp.
1 1/2 c. granulated sugar
1 1/2 c. packed light-brown sugar
3 eggs
1 T. vanilla
3 c. semisweet chocolate chips
3 c. old-fashioned oates
2 c. sweetened flaked coconut
2 c. chopped pecans (8 ounces), optional

Heat oven to 350. Mix flour, baking powder, baking soda, cinnamon and salt in bowl. In 8 -quart bowl, beat butter on medium speed until smooth and creamy. Gradually beat in sugars; beat to combine, 2 minutes. Add eggs, one at a time, beating after each. Beat in vanilla. Stir in flour mixture until just combined. Add chocolate chips,oats, coconut and pecans. Drop dough by 1/4 c. onto ungreased baking sheet, spacing 3 inches apart. Bake in 350 degree oven 17-20 minutes, until edges are lightly browned; rotate sheets halfway through. Makes about 3 dozen large cookies. Could make 90 medium cookies, bake about 10 minutes. Use your own judgment.

Candy Cane Chocolate Chip Cookies
(submitted by Stephanie Schiess)
 
1 cup packed brown sugar
1/2 cup granulated sugar
1 cup butter
2 eggs
1 tsp baking soda
1/4 tsp salt
1 tsp vanilla
2 1/4 cup all-purpose flour
12 oz (2 cups) milk chocolate chips
1 package peppermint candy canes, unwrapped and crushed
 
Preheat oven to 375 degrees F. Combine butter and sugars, mix until creamy. Add eggs and mix well. Add soda, salt, vanilla and flour. Mix until well combined. Fold in chocolate chips and candy cane pieces. Drop by teaspoonful onto ungreased cookie sheets spacing at least 1-2 inches apart. Bake 8-10 minutes until edges are golden brown. Allow to cool on cookie sheets about 5 minutes before removing to cooling racks.


Krispie Cookies

(submitted by Julie Edwards)
 
1 cup butter
1 tsp. Baking powder
1 cup white sugar
1 tsp. Vanilla
1 cup brown sugar
2 cups rice krispies
2 eggs
2 cups oats (regular, not quick)
2 cups flour
1 cup coconut
1 tsp. Baking soda
1 cup chopped pecans
1 to 1 1/2 cups chocolate chips

Cream butter and sugars. Add eggs and vanilla. Beat well. Mix flour, soda and baking soda together, then blend into first mixture. Stir in rice krispies, oats, coconut, and pecans. Drop by teaspoon full on cookie sheet. Bake at 350 degrees for 10-12 minutes.


For the following two cookies, I used my chocolate cookie mix for the cookie itself with the following additions:

Peanut Butter Cup Cookies
(submitted by yours truly)
1 recipe chocolate cookie mix, prepared
36 mini Reese's Peanut Butter cups, unwrapped
(For these I found a new thing this year- a package of mini peanut butter cups all unwrapped and ready to eat!... Heaven help us all...)

Prepare cookies as directed on mix except when time to bake, roll dough into 1-inch ball and place on an ungreased cookie sheet. Press a peanut butter cup into the center of each unbaked cookie. Bake 6-8 minutes in 350 degree oven until edges dry and crack slightly. These cookies are small, they don't need to bake long.


Chocolate Caramel Cookies

For these cookies, I used the same chocolate cookie mix as I used above but in the center, I added some home-made vanilla caramel. Instead of just pressing the caramel into the center of the cookie, I wrapped the dough around the caramel and then baked as directed above. I think they turned out yummy and a little different, but I have to be honest... my neighbor totally upstaged me by adding chocolate covered caramels into the center of each cookie and then rolling the cookies into sugar. Dah! Why didn't I think of that? They were DELICIOUS! (More delicious than mine..)


These weren't exactly cookies- I'm not sure what to call them except yummy! They had a mixture of nuts, cereal and marshmallows. My kids devoured them! Thanks to Michele K.!!