Monday, May 31, 2010

Camping Fare: Graham Crackers, Granola Bars, Pancakes

We went camping for 2 nights out in Cave Lake State Park, Nevada. We totally roughed it- didn't even camp in a campground with bathrooms and picnic tables. The kids had a blast! Me? Not so much... but it was fun to watch them have fun so it was worth it. I didn't take as many pictures as I should have (I was too busy trying to keep warm in the snow.. brrr!) but here's what I have:
Thursday before we left I borrowed my friend's wheat grinder and ground some of my wheat. I also ground some corn and some brown rice (for later). So with my freshly ground wheat I made some graham crackers and some granola bars for the trip.

Graham Crackers

3 cups whole wheat flour
1/4 cup brown sugar
1 tsp baking powder
1/2 tsp baking soda
1/4 tsp salt
1/2 tsp cinnamon
1/3 cup oil
1/3 cup honey
2 Tbsp molasses (or dark corn syrup)
1 tsp vanilla
1/4 cup milk

Combine flour with brown sugar, baking powder, baking soda, salt and cinnamon in a large bowl. Mix oil, honey, molasses, vamilla and milk in a measuring cup or bowl. Add liquid ingredients to the dry mixture. Mix well. Use your hands to finish mixing. If dough is too sticky, add more flour 1/4 cup at a time. If dough is too dry, add more milk 1 Tbsp at a time. Form dough into a ball. Preheat oven to 300. Divide dough in half. Roll dough directly onto greased cookie sheets to cover the entire sheet. Use a small pizza cutter to cut dough into 2 inch squares. Do not separate. Prick the surface with a fork. Bake 20 miuntes or until edges are slightly browned. Remove from oven and let crackers cool before removing from cookie sheet. Store up to 3 weeks in airtight container. Makes 2-3 dozen.

Granola Bars
3/4 cup brown sugar
1/2 cup sugar
1/2 cup butter, softened
2 Tbsp honey
1/2 tsp vanilla
1 egg
1 cup flour
1 tsp cinnamon
1/4 tsp salt
1/2 tsp baking soda
1 1/2 cup oatmeal
1 1/4 cup crispy rice cereal
1 cup chocolate chips*
In a large bowl, cream sugars and butter until fluffy. Add honey, vanilla and egg. Mix well. Blend in flour, cinnamon, baking soda and salt. Stir in remaining ingredients. Press firmly into the bottom of a grease 9x13 pan. Bake at 350 for 20-25 minutes. Bars will firm as they stand. Cool and cut into bars. Makes 24 bars.
*I used some Craisins that I had bought last month. You can sub chocolate chips with: 1 cup coconut, 1/2 cup peanut butter, 1/2 cup nuts, 1 cup raisins, 1/2 cup fruit preserves (or any combination)
I doubled this recipe so we had enough for our trip and for some daily snacks for the kids.

For our first camping breakfast, I pre-cooked some pancakes to take along with us. I wrapped them in aluminum foil with some butter and re-heated them in the fire. We topped them with some syrup that I brought along. They're also excellent with apple sauce on top.
Blender Pancakes
1 cup milk
1 cup whole wheat berries*
2 eggs
2 tsp baking powder
1/2 tsp salt
2 Tbsp oil
2 Tbsp honey

Put milk and wheat into blender & blend on highest setting for 4-5 minutes. Add rest of ingredients and blend on low speed. Pour 1/4 cup fulls onto pre-heated 375 griddle. Cook until edges dry out and top is bubbly, turn and cook another 20 seconds on second side.
*If you soak wheat berries overnight (about 12 hours) before making this recipe, I've found that it's much easier to process in your blender.

For our first lunch we had hotdogs wrapped in the home-made buns I made earlier in the week. (I kept them in the freezer to keep them fresh).
Also, I bought a 2 lb block of mozzarella cheese at Costco for $2/lb. I sliced about half of it up into sticks for a cheap version of "string" cheese.

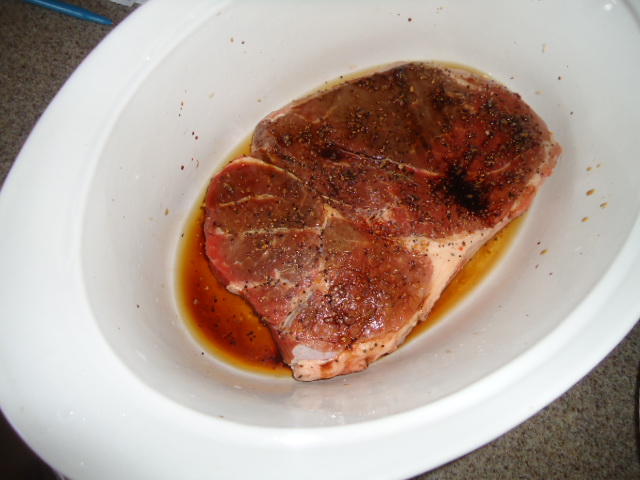
And for dinner #2 we had planned steak, dutch oven potatoes, and peach cobbler. Well- we didn't actually get to the cobbler. The kids all fell asleep so I ended up making the cobbler when we got home instead. The family demanded it!

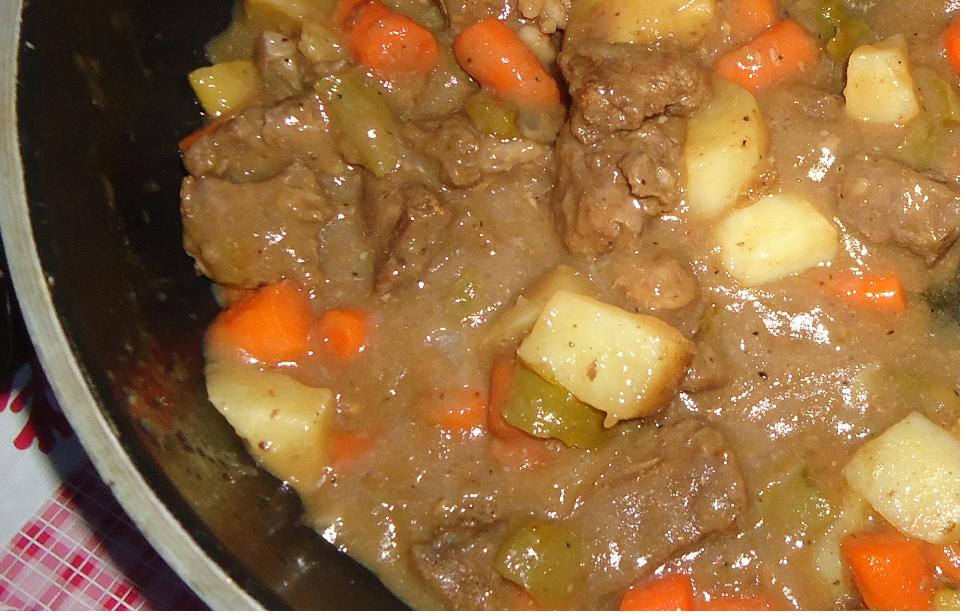
The last morning of a campout is some of the best eating in my opinion. Eggs! We always save the leftovers from the previous nights in the cooler and mix it all up with some eggs on the last day. SO GOOD! Again, you can do this in the dutch oven.

Dutch Oven Cooking: Eggs, Potatoes, Cobbler


Dutch Oven Potatoes
(Sorry, no picture- I was too busy eating to snap a picture!)

1 onion
1/2 lb uncooked sausage
10-15 medium potatoes
1/4 cup butter
8 oz whole mushrooms
1/2 bell pepper, chopped
Peel and roughly chop the onion. Open the package of sausage and cut into small-medium chunks. Carefully wash and chop the potatoes (do not peel). Step 2 Preheat your oven. Proper heating is the key to good Dutch oven cooking. Get some good coals ready from your campfire. We used a block of hickory for our coals, most people just use charcoal briquettes. Once they are ready, spread them out evenly and place your Dutch oven centered over the top. At this point, all the briquettes should be on the bottom. Heat approximately for 15 to 20 minutes before adding the food. Step 3 Begin to cook. Place the chopped onion and sausage into the heated Dutch oven (they should sizzle as they touch the bottom). Cook the sausage thoroughly before adding the potatoes. To avoid burning, you might want to remove some of the briquettes from the bottom. After the sausage is cooked, stir in the potatoes, mushrooms, pepper and butter and transfer the majority of the heat to the top of the oven. There should be six to seven briquettes on the bottom and nine to 10 on top. Step 4 Cook slowly. The saying "patience is a virtue" could not be more true when cooking in a Dutch oven. Slow cooking is what gives the potatoes their rich taste and soft texture so while you may need to stir them occasionally, it is best to leave the lid on as long as possible to avoid losing heat in your oven. Good Dutch oven potatoes will cook for at least an hour before they are ready to serve, so start cooking early if they are on your menu. Step 5 Add cheese. When the potatoes are at the desired consistency (potatoes should be completely soft), you can add cheese if you like. We didn't. Remove the oven from the heat and sprinkle cheese over the top, then return the lid and let the cheese melt before serving.

Easy Peach Cobbler
 
1 lg. can sliced peaches

1 pkg. white or yellow cake mix
1/4 lb. butter (1 stick)
ground cinnamon, for dusting

Utensils: Dutch Oven: Prepare charcoal (35 pieces) for Dutch Oven baking.
Preparation: Line Dutch Oven with heavy duty aluminum foil. Rub the foil down with cooking oil. Place 8 pieces of charcoal under the oven and 20 pieces on top. When the oven is hot, pour peaches and juice into the oven. Add the dry cake mix on top of the peaches. Cut the butter into pats (small chunks) and place on top of the cake mix. Dust everything with cinnamon (lightly). Put the lid back on the oven and bake for 40 minutes.Check cake with a clean straw or knife. Do this by sticking the straw into the cake mix. If the straw comes out clean, the cake is done. If not, add charcoal to the oven and bake 10 more minutes. Check again.
*A double batch can be baked in a 14 inch Dutch oven. 2 cans of peaches makes a juicier cobbler.

If you don't have a cake mix? Use the crumb topping mix that I used for my blueberry pie. Still very simple and easy.

On the last morning of our campout we made an egg & potatoe skillet from the leftover stew(pictured on top), steak & dutch oven potatoes. Use the same briquette placement as you did with the beginning of the Dutch Oven Potato recipe and cook like you would on a frying pan on your stove. Add all your leftover goodies first, heat thoroughly then push the meat and vegetables to the side while you cook the eggs. Add about a Tbsp butter to the center of the oven before cracking your eggs one at a time into it. Make sure you don't have any briquettes under the center of your oven. This would cause a hot spot and the eggs would cook too fast. When eggs are slightly firm, stir- keeping them in the center away from the other ingredients until they are no longer runny. Once the eggs are finished, stir the entire dish to combine all the food. Grate some cheese over the top and remove from heat. Allow cheese to melt and serve.

Sunday, May 30, 2010

Roast Beef Sandwiches, Beef Stew, Shredded Beef

Remember when I said I bought 16 lbs of beef? Well, it was actually 6 Crossrib chuck roasts. Here's what I did with them:
I knew there were a few meals that I'd be using these roasts for this month, so to simplify things, I just prepped each roast for a meal as I put it away last week.  


This one was cut up for beef stew. This makes it a whole lot easier when you're camping. I added some simple marinade to the bag as well before I put it away. I just added 1/4 cup Soy sauce and 1/4 cup balsamic vingar as well as 1 tbsp parsley and 1 tsp black pepper.This roast I actually refrigerated and cooked along with the roasts for Sunday dinner. Except when this one was finished I let it cool and sliced it up for sandwiches. This is what I've been sending with my hubby in his lunch. I again used the above marinade on this roast as well: 1/4 cup soy sauce, 1/4 cup balsamic vinegar, 1 tbsp parsley, 1 tsp black pepper.
Just my little plug again for saving the broth after you've cooked your roast. It makes an awesome soup base or gravy for another meal. Freeze it!
And this roast I quartered and seasoned for shredded beef. This will give us 2-3 meals worth of shredded beef type meals sometime this month.

Shredded Beef
2 1/2 - 3 lb chuck roast
1 Tbsp ground cumin
1 Tbsp red chili powder
1 tsp salt
1/2 tsp garlic powder
1 cup salsa
1/2 onion, chopped
Cut roast into quarters. Combine seasoning and rub all over each piece of meat. (At this point you can freeze the seasoned meat, which I did- or continue.) Add meat to large slow-cooker along with salsa and onion if desired. Cook on LOW 7 hours. Remove beef pieces and shred with a fork. Return to slow-cooker and cook an additional 2-3 hours. Serve on tortillas with lettuce, tomato, and fresh salsa.
Lastly- we enjoyed the beef stew this weekend while camping. YUM! Really hit the spot as we ate it while huddled under blankets watching the snow fall around us...yes.. we were able to enjoy snow this Memorial Day weekend. Aren't we lucky?!

Easy Beef Stew

1 1/2 lb seasoned stew meat
4 cups brown gravy (I used some from my freezer- saved from a previous roast dinner)
2 cups peeled and chopped carrots
1 large green bell pepper, cut into chunks
1 onion, cut into chunks
5 potatoes, cut into chunks

Combine ingredients in 5 qt Dutch oven and cook over medium heat until potatoes and carrots are tender. We ate this while camping, so I pre-cut all the meat and vegetables at home. Made for a super-easy campout meal!


Wednesday, May 26, 2010

Garden Veggie Quiche & Berry Yogurt Smoothie

It was a nice warm day today. After working in the yard all morning, nothing sounded better than a yummy smoothie for lunch. Mmmm. We rounded it out with a few of the mini muffins that were in the freezer from Saturday. Perfect! By the way- you've probably all seen the "Smoothie kits" in the store... this is basically what's in those kits but about 1/4 of the price. (Costco has good prices on their frozen berries right now.)

Berry Yogurt Smoothie

2/3 cup plain yogurt
2 cups frozen berries
2 cups milk
2 Tbsp honey

Blend until smooth. Enjoy!

I was actually planning to have stuffed peppers today for dinner, but I got a coupon in the mail today with a picture of a quiche on it... It sounded so good that I changed my plans for dinner!

Garden Vegetable quiche
6 cups hashbrowns (I shredded 10 small potatoes- should have shredded 8)
2/3 cup melted butter
8 eggs
1 cup milk
1 small zucchini
1/2 green bell pepper
1/2 tsp salt
1/2 tsp pepper
1/4 cup chopped chives (or use green onions- they're cheaper if you don't have a garden)
1 roma tomato- chopped
1/2 lb shredded cheddar cheese

Press the hashbrowns into two 9-in pie plates all over the bottom and up the sides of the pan. Drizzle 1/2 melted butter over each pie dish. Bake at 425 F for 25 minutes. In the meantime, chop vegetables and shred cheese. Whisk eggs and milk together in a medium bowl. When potato crust is finished, sprinkle a layer of cheese along the bottom of each shell. Then layer vegetables. Pour egg mixture over the top and sprinkle cheese over the top of each quiche. Return pie plates to oven for another 25 minutes until egg is firm.

And what did I do with the extra hashbrowns that I shredded? Uh.. I cooked them while my "crust" was baking and I ate them of course. Yum!

Cost breakdown for the first week

Hamburger Helper w/green Beans = $1.25 (.21 per person)
Meat Mix = $8.50 (8 meals $1.07/per meal)


Noodles = $.49 (enough for 3 meals- $.17 per meal )


Spaghetti Sauce = $4.75 (enough for 4 meals - $1.18 per meal)


Cheese for Lasagnas = $5


Cost per Lasagna (feeds 8-10)= $4.92 ($.49 to $.62 per serving)


Chili (2 meals worth) = $4.82 ($.41 per serving)


Waffles = $.77 ($.13 per serving)


Syrup = $1.12 ($.10 per serving)


Cream Sauce = $.33


Mini Muffins = $1.38 ($.03 per muffing)


Veggie Stir-fry w/rice (2 meals worth) = $4.20 ($2.10 per meal or $.26 per serving)


Snack Veggies = $.85


Egg Drop Soup = $.17 ($.03 per serving)


Sunday Roast (enough for 3 meals AND we served guests) = $10.83 ( $.35 per serving)


20 Rolls and 10 hotdog buns = $2.91 ($.10 per roll)


Mashed Potatoes (2 meals AND guests)= $.91 ($.46 per meal & $.03 per serving)


Blueberry Pie = $3.10 ($.40 per serving)


Vegetable Beef Soup (serves 12)= $2.55 ( $.21 per serving)


Tortillas(12) = $.27 ($.02 per tortilla)


Tacos (Including Tortillas & vegetables) = $2.77 ($.23 per serving)


Quiche (serves 12) = $2.75 ($.23 per serving)


Berry Smoothie (serves 5) = $1.64 ($.33 per serving)


Other things we’ve eaten:

Breakfast

Cereal & milk (x4) = $7.44

Juice = $3

Waffles & syrup = $.77

Eggs & toast = $.42

Lunch

Cottage cheese & grapes (x2)= $4

Peanut butter & jelly = $.75

Leftovers (x3) = $0

Dinner

Chicken Broccoli & Rice = $2.80

Snacks

1 lb grapes = $1

4 cups blueberries = $2

4 oranges $.60

Cottage cheese = $1

Weekly Total: about $83

AND I still have these meals prepared/partially prepared

Stir-fry

Lasagna x2

Chili

Vegetable Beef Soup

Spaghetti

Shepherd’s Pie

24 mini muffins

Several lunch-portion leftovers

Tortillas & Tacos


Remember when I made noodles? Well then, this is going to look pretty familiar!


Tortillas

2 1/2 cup flour
1 cup water
1/2 tsp salt
1 tbsp oil

In a medium sized bowl, combine 2 cups flour, water, salt, oil. Add enough remaining flour to make a stiff dough. Sprinkle some flour on a clean surface and knead until dough is smooth and elastic. Return dough to bowl and let rest 30 minutes. After dough has rested, roll out flat and thin (about 1/8 inch). I cut my dough with a pizza cutter into the desired shape. Use a small plate as a template for perfect circles- or cut dough into rectangles if you want to be very quick. Cook on hot griddle about 15 seconds, flip and cook 5-10 seconds more.

While your dough is resting, go ahead and get everything else ready for Tacos.

Taco Filling
1 cup meat mix (from last Wednesday)
1 cup rice (leftover from Saturday)
1 can black beans
1 Tbsp cumin
1 Tbsp chili powder
1 tsp salt
1 tsp oregeno
1/4 cup water
1 Tbsp flour

Combine ingredients except flour. When liquid starts to bubble, sprinkle flour over mixture and stir quickly. When filling has thickened, remove from heat. Keep covered if not using immediately so it will stay warm.

I also used the time to chop 2 Roma Tomatoes, and 1/4 head lettuce and shred 1/4 lb cheese.

Tuesday, May 25, 2010

Family Home Storage Center & Bottling Potatoes

Yesterday had a chance to go to the Family Home Storage Center in Springville, UT on my “lunch” break. (I really, honestly went at noon!) The “staff” consists of unpaid service missionaries and they are SO helpful. They are there because they want to be there and are so ready to help people it’s silly. I bought 25 lbs of rolled oats, 20 lbs of elbow macaroni, and 1 #10 can of dry milk. My total came to about $27. They have order forms that you can fill out and bring with you or you can fill one out when you get there. You do NOT need to be a member to buy food from them. You can either leave ward info blank on the order form or just write in your city, etc.

I will end up using some of my purchase for meals in the next month, but I also really try to buy more than what I’ll need so eventually I can start building up my food storage. My husband and I were talking last night about how fragile are lives really are… It’s interesting because, yes, we all love the convenience of our lives, but really- the more convenient are lives become, the more fragile they become as well. That’s why I believe it’s SO important to be prepared. It’s not good enough to just have food in the basement or seeds for the garden. You need to know what to do with it all. What good is a dozen buckets of wheat in your basement if you don’t know how to make bread? So practice now. Become a good cook while you have the luxury of messing up and occasionally “wasting” ingredients. Look at it as an investment. J


Yesterday I also had a chance to bottle some potatoes. Bottled potatoes are my version of “instant” potatoes. They sure do taste a LOT better! It’s really very simple. Just peel and chop potatoes and add to a large pot of water with about 1 tsp Fruit Fresh or 1 Tbsp Lemon Juice to keep potatoes from darkening. When potatoes are all chopped, add to clean jars, leaving about 1” headspace. I used quarts. Discard water from pot. Add enough hot water to cover potatoes in jars. Add 1 tsp salt per jar if desired. Pack jars into cold Pressure CANNER. The water in the canner should be about ½ way up the jars (mine takes 3 quarts water). Add 2 tbsp vinegar to water to keep rims and pot itself from darkening. Close canner securely and allow it to heat and vent steam from vent pipe for about 5 minutes. (It will take at least 30 minutes for this to take place.) Once canner has been heated and vented, add 15lb weight. If you live in a different area, check for your proper weight. In Utah, it will almost always be 15lb no matter what you are canning. Let the canner build pressure until the weight gently rocks. Start timer- 40 minutes for quarts. Remove canner from heat and allow to cool until pressure dissipates. Do NOT remove weight or try to remove lid. This will take another 30-60 minutes. Remove jars from canner and allow to sit undisturbed in a draft-free area overnight. Remove rims, wipe jars clean. Label and store.

Vegetable Beef Soup

Yesterday was so Blah! Seriously… who likes to wake up to snow on the ground at the end of MAY! So.. I changed my mind about tacos yesterday and made vegetable beef soup instead. It was super duper easy with all the leftovers from yesterday:


Vegetable Beef Soup

2 cups leftover gravy (or 2 cups beef broth)
*2 cups chopped carrots, cooked
*2 cups chopped celery, cooked
1 can Corn, un-drained
1 can green beans, un-drained
16 oz plain tomato sauce
2 small potatoes, peeled and chopped
About 1 lb leftover roast, chopped
½ onion, chopped
1 tsp salt
1 tsp basil
½ tsp black pepper
¼ tsp nutmeg

If using uncooked carrots and celery add these to the pot first along with 1 Tbsp olive oil. Saute for 5-10 minutes and then add remaining ingredients except seasonings. Heat to boiling and then simmer 20-30 minutes. Add seasonings, stir and serve.
*I used the extra carrots and celery that I steamed on Saturday along with leftover gravy and roast from Sunday dinner. I also had enough rolls leftover from Sunday as well to serve with the soup. You can use 1 lb cooked ground beef if you don’t have leftover roast.